Installation
If you can't use mouse and keyboard yourself, please ask someone to help you with the installation and the following setup of Semanux Access, to go through the described steps together with you.
For the installation, your computer must be running Microsoft Windows 10/11.
In order for the installation to go as smoothly as possible, your operating system and drivers should be as up to date as possible.
- First you need to download the latest installation file of Semanux Access:
To do this, click on the following link: Semanux Access Setup.exe.
Info: To perform the following steps of the installation, you need administrator rights on your computer. Don't know what that is or how to do it? Please contact the person who provided you with your computer. Alternatively, we offer an experimental installation file that does not require administrator rights: Semanux Access (no-admin) Setup.exe. However, this does not support all functions. In particular, this variant is not compatible with Grid 3. If you want to use Semanux Access together with Grid 3, install Semanux Access with administrator rights. - After the download is complete, you can start the installation by double-clicking on the installation file.
The following window will probably open afterwards (or a similar window if you have another anti-virus program installed):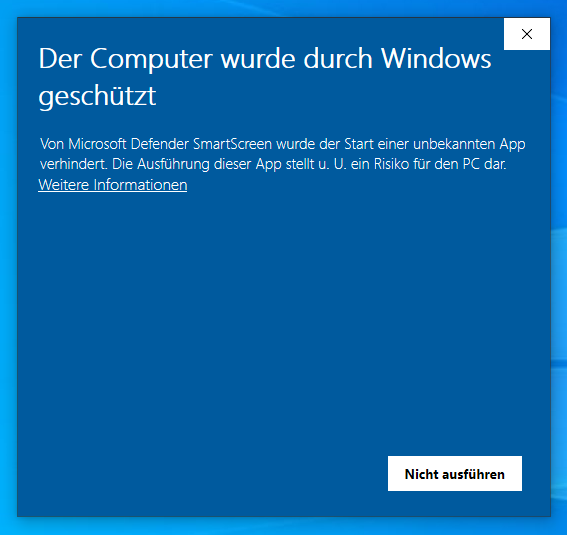
Click here on More Information and then on Run Anyway.
Info: This window opens because Semanux Access is relatively new software and Microsoft Defender is not yet aware of it. However, since Semanux Access is safe software, your computer is not at risk from this. - After that Windows will ask you to confirm the installation with administrator privileges:
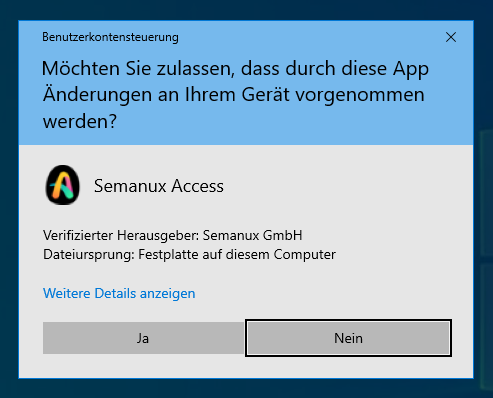
Click Yes here. - In the next step Semanux Access installs itself automatically. You should see the following window with the installation progress:
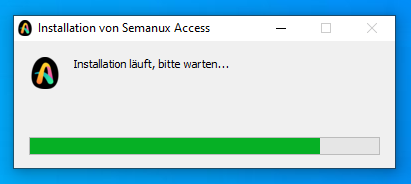
With this, Semanux Access is already installed! By the way, the program files are located in the folder C:\Program Files\Semanux Access. - The following window will probably open after that (or a similar window if you have another anti-virus program installed):
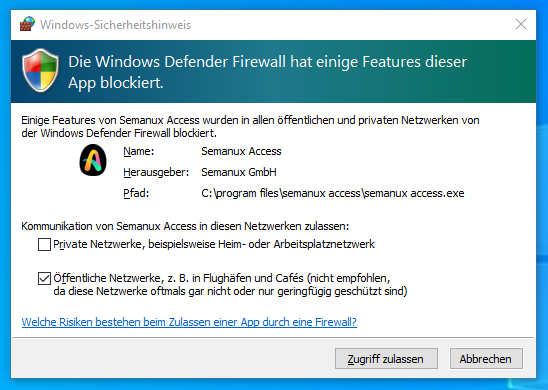
Click on Allow access here. - After you have successfully completed the installation, Semanux Access will start automatically. Otherwise, you can start Semanux Access either by double-clicking on the desktop icon or via the start menu.
Your computer must be running macOS 13 for installation. Semanux Access may work on other versions of macOS, but we only officially support one version of macOS. We welcome your feedback on the compatibility of Semanux Access on other versions of macOS.
- First you have to download the latest installation file of Semanux Access.
Click on the following link: Semanux Access Setup.dmg.
Info: In recently years, Apple has changed the processor technology in its computers from Intel to so-called "Apple Silicon", which are marketed as M1, M2 or M3, among others. In order to offer you the best experience, we offer you a separate variant of Semanux Access for each technology. You can easily find out on your Mac which version you need for your Mac. To do this, click on the apple in the top left of the menu bar and select "About this Mac". Among other things, the processor of your computer is displayed in this window. If it has "Intel" in its name, you need the Semanux Access variant for Intel. If it has an "Apple" in its name, you need the Semanux Access variant for Apple Silicon. - Once the download is complete, you can start the installation by double-clicking on the installation file:
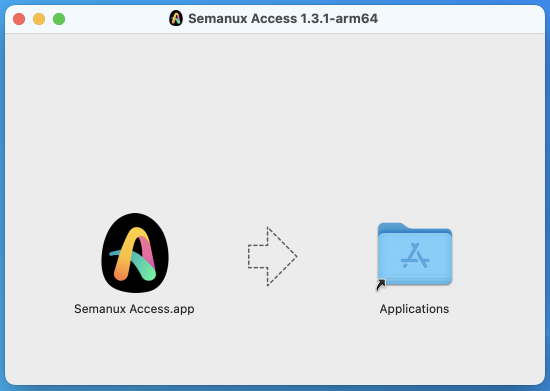
ZDrag the icon of "Semanux Access.app" with the mouse into the icon of your "Applications" to install Semanux Access on your Mac. You can then close the window.
Info: You may also find a Semanux Access icon on your desktop after installation. However, this is not the application itself, but the unzipped installation file. You can remove it by right-clicking on the icon and selecting "Eject". - You can then find Semanux Access in Launchpad or in Finder under "Applications ".
When starting for the first time or after an update, macOS may display a dialog asking whether you really want to open Semanux Access: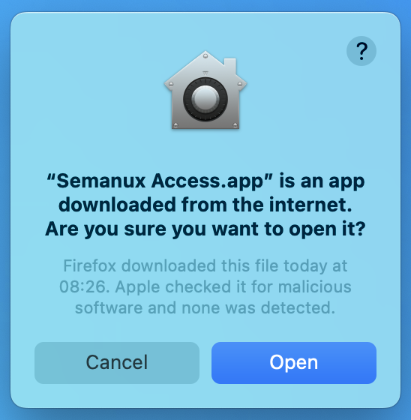
Click here on Open.
Continue in the next section with the first setup.